Tools you will need:
Ratchet
Long extension
Swivel extension, U joint type (Must have)
24mm Socket
13mm Socket
10mm Socket
13mm Wrench
12mm Wrench
11mm Wrench
10mm Wrench
8mm Wrench
7mm Wrench
6mm Allen with ball end works best
Phillips screw driver
Straight slot screw driver
Pliers
Razor blade
Drill
Small drill bit (size not very important, for pilot holes)
Large drill bit (9 to 10mm, a little bigger is even fine)
Center punch
Brake Bleeder kit
We suggest a Motive Brake Bleeder
Small Felt tip marker or pen
Telescoping magnetic tool comes in handy
Procedure
Removal of Airbox
1. Remove the airbox by loosening the clamp around the J tube. Loosen the clamp for the other hose attached to the airbox. Remove the two screws in the front of the airbox. Then remove the two screws in the rear of the airbox. Remove the plug going to the AFM. Then you will be able to lift the whole airbox up and out of the car.
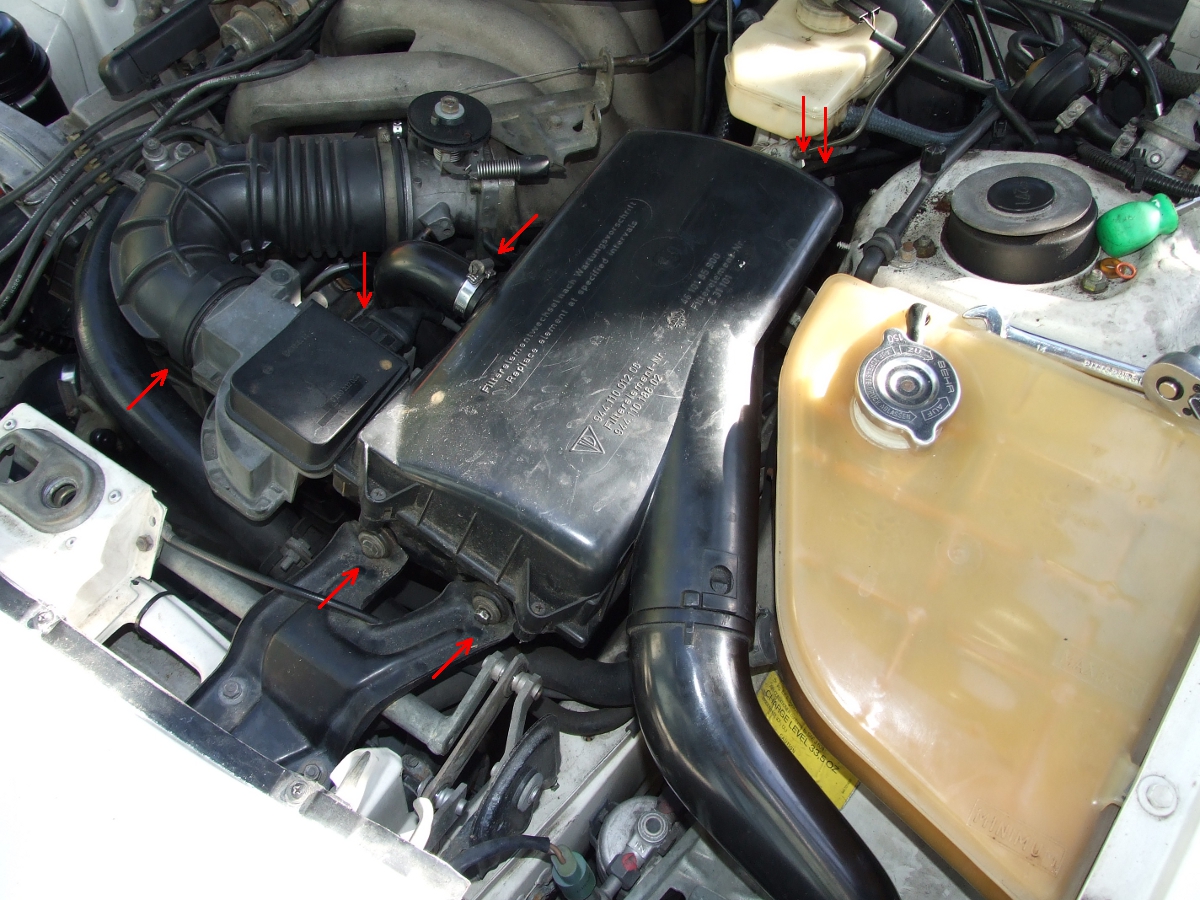
2. Loosen the clamp on the hose that’s attached to the brake booster and remove the hose. Also, pull off the vacuum hose.
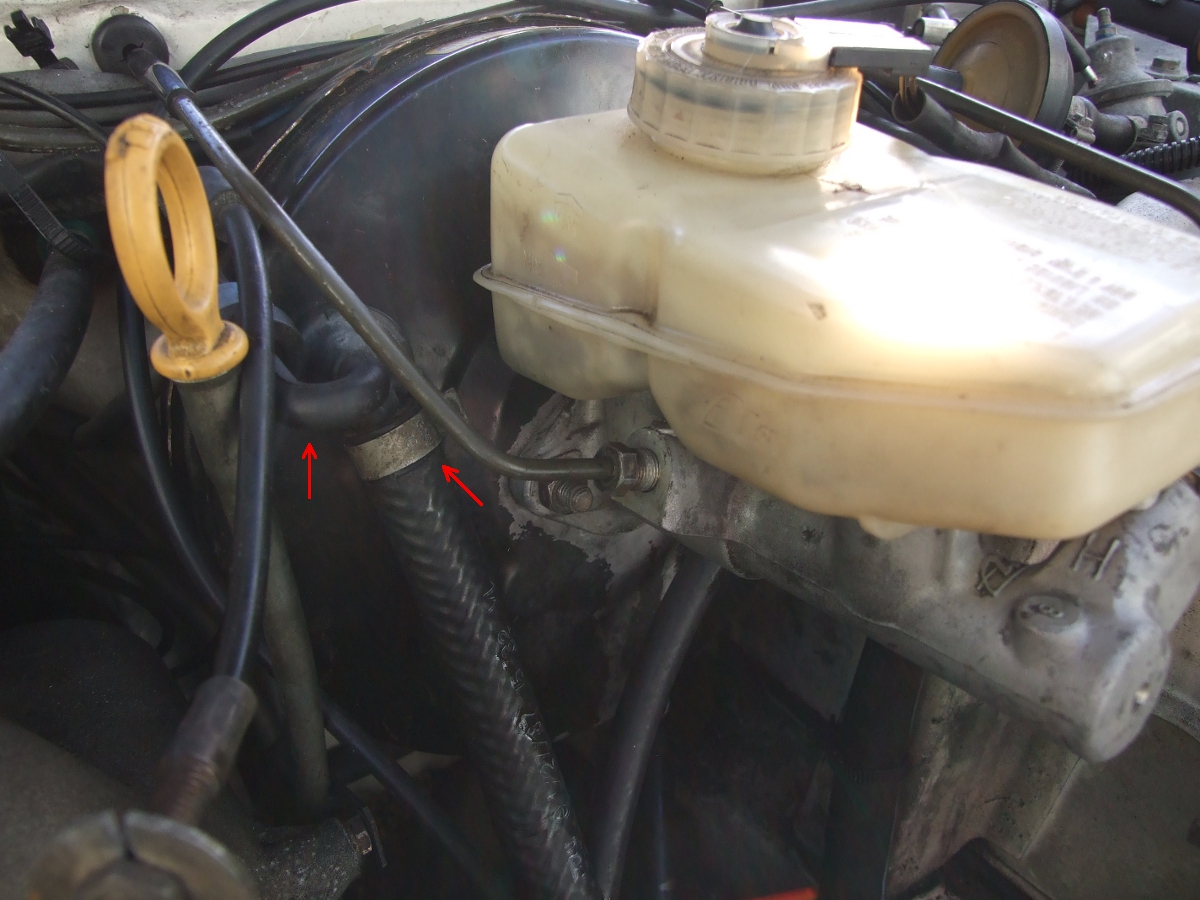
3. Remove the wires that are attached to the reservoir cap.
Drain the brake fluid from the brakes and clutch. There are several ways to do this. This can be done by sucking the fluid out of the brake calipers from the bleeder screws, and the bleeder screw on the clutch slave cylinder. Or, you can drain the fluid from the reservoir by removing the blue hose that connects the reservoir to the clutch master cylinder. This is the messy way since the fluid will still be inside the brake and clutch master cylinder. When you remove the lines from the master cylinders fluid will come out. Be ready to catch the fluid and clean up any messes. Letting the brake fluid sit on any painted part of the car will strip the paint away.
Once the fluid is drained, you can remove the hose from the brake reservoir.

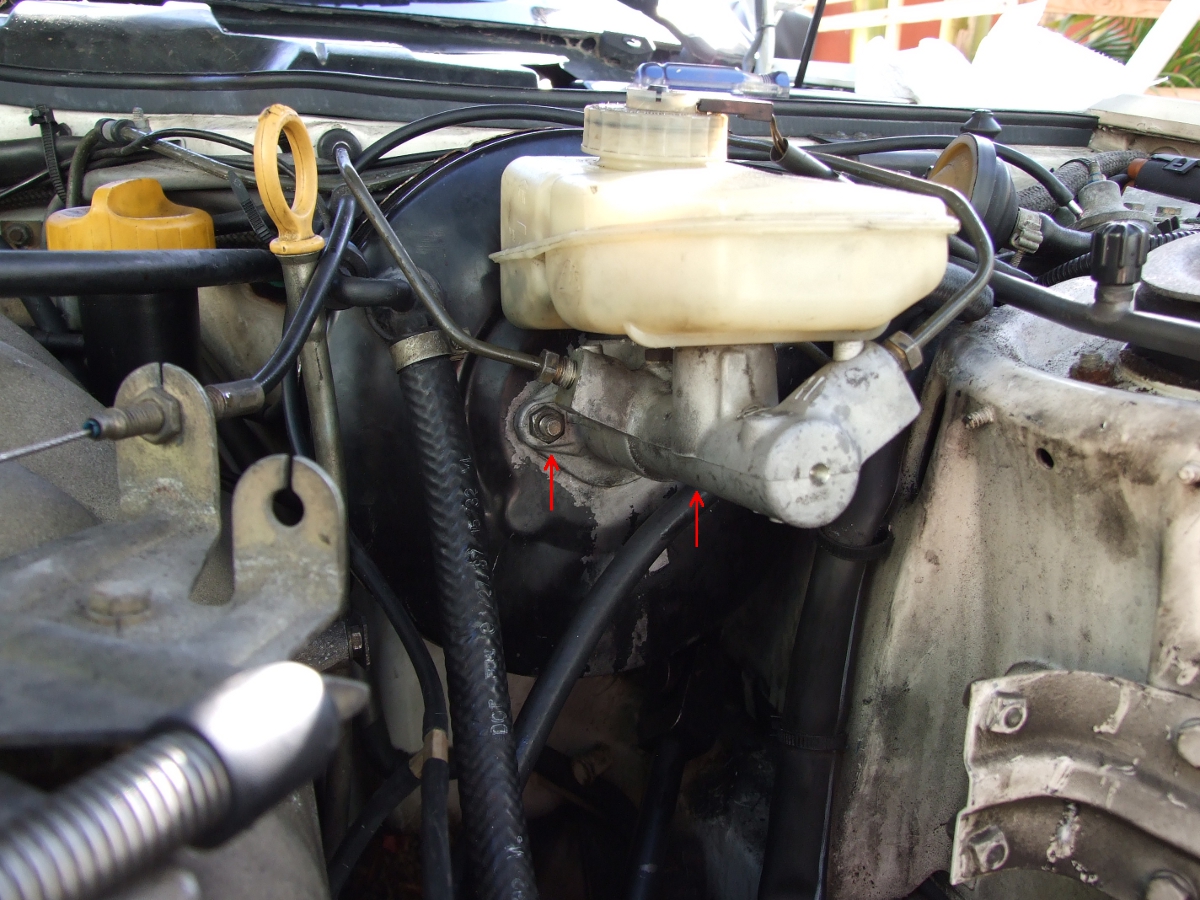
4. Remove the brake lines that connect to the master cylinder.

5. Remove the two nuts that hold the brake master cylinder onto the brake booster and pull off the master cylinder.
6. Loosen the hose clamp and remove the vacuum hose. This hose crosses over the brake booster and will get in the way. Remove it and move it aside.
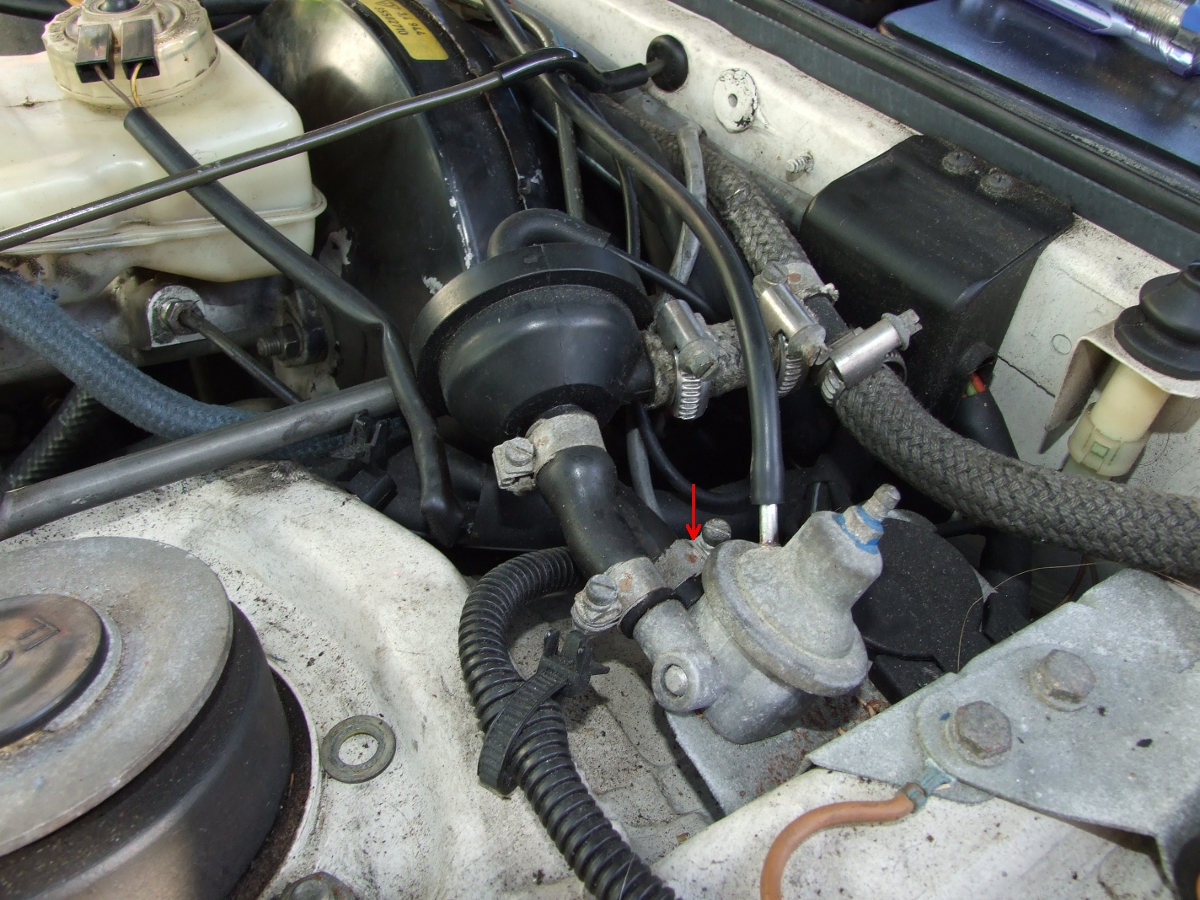
7. Remove the bolt that holds the dip stick on, and remove the dipstick.

8. Remove the steering wheel. Pull the horn pad off the steering wheel. Just grab the sides and pull towards you.
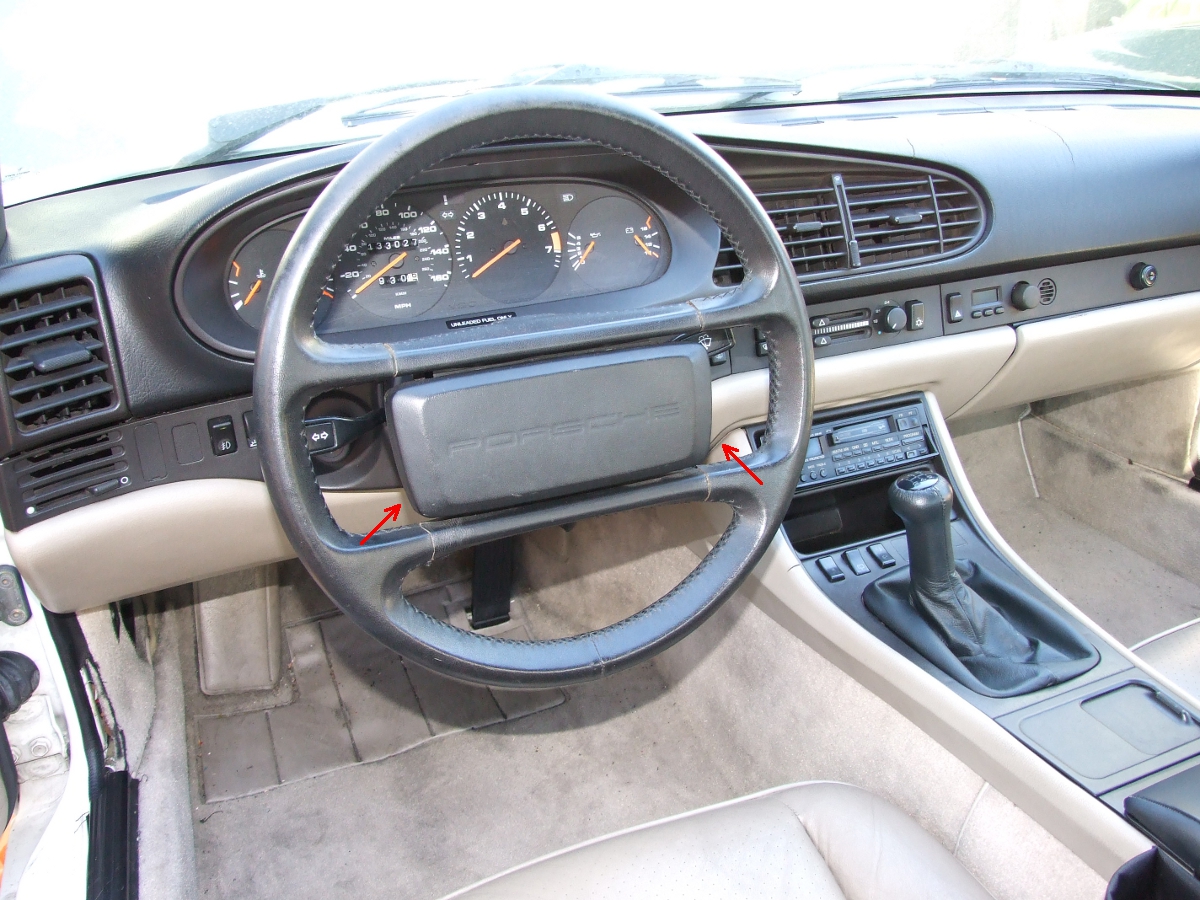
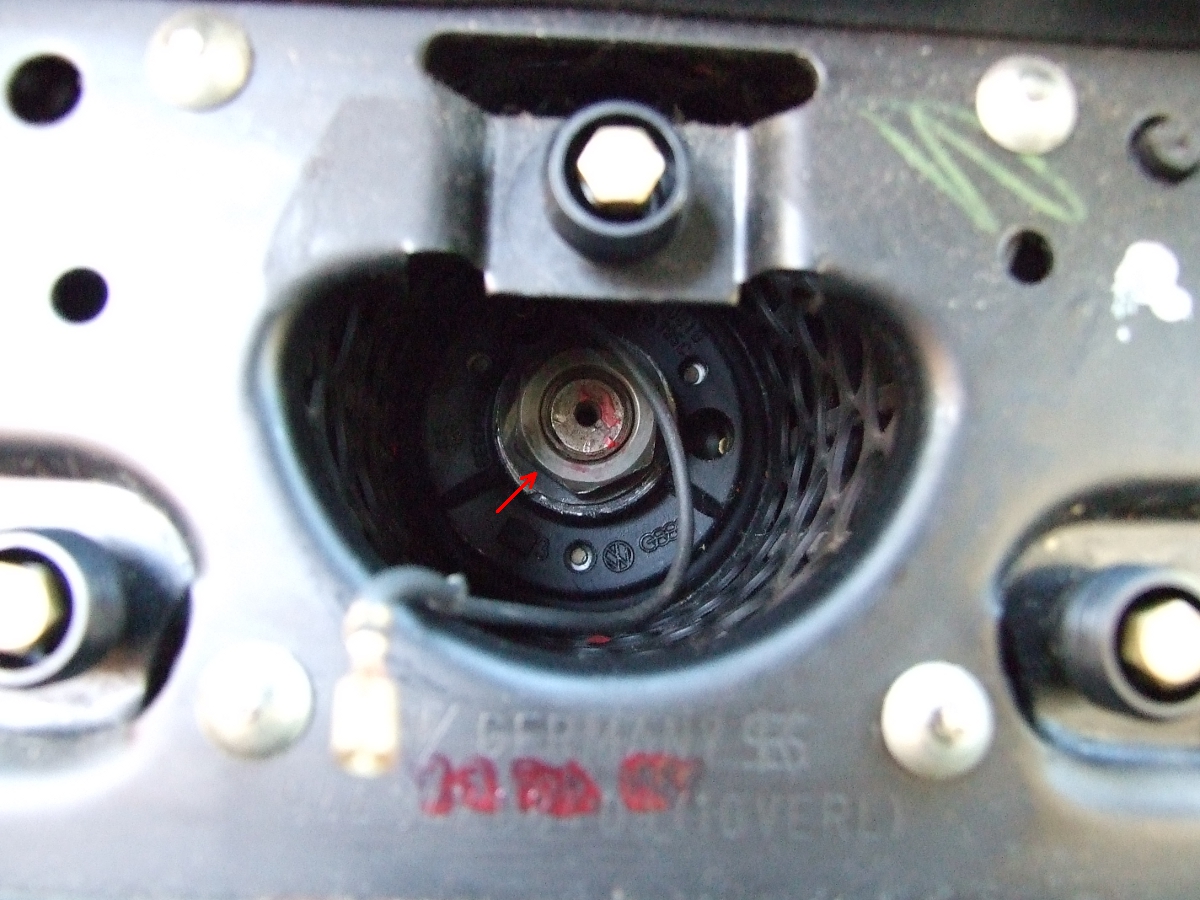
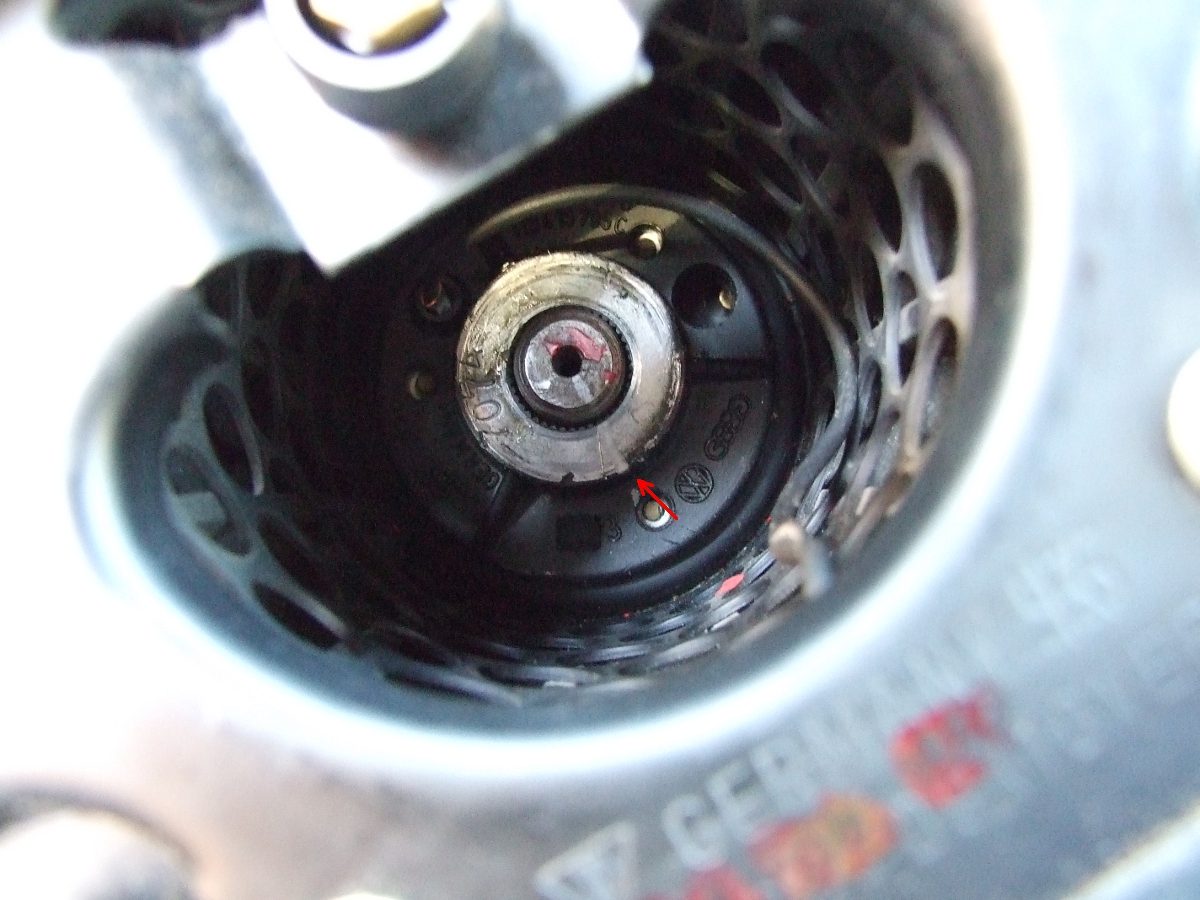
9. In the middle of the steering wheel is a large nut, remove this nut with a 24mm socket and long extension. Before pulling the steering wheel off, make a mark with a marker on the shaft and the wheel. This way it’s much easier to align when you reinstall it.
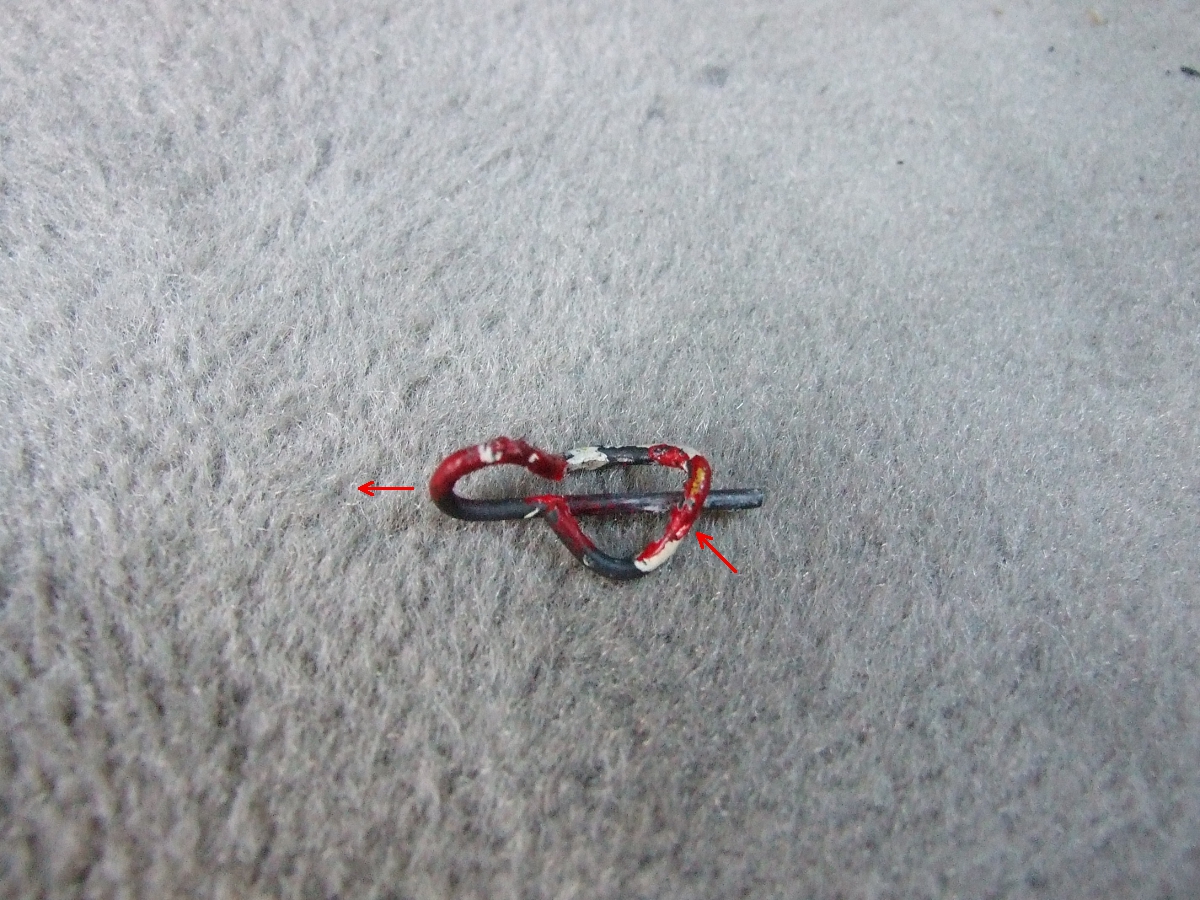
10. Crawl under the dash to remove the brake booster from the brake pedal. It’s attached to the brake pedal with a clip. Depending on the year of your car this clip could be a different shape.

11. Remove the 3 nuts that hold on the brake booster. Be careful and don’t drop the nuts or washers, they can fall behind the carpet and are hard to get out. If you do loose them, they are 8mm by 1.25 pitch.
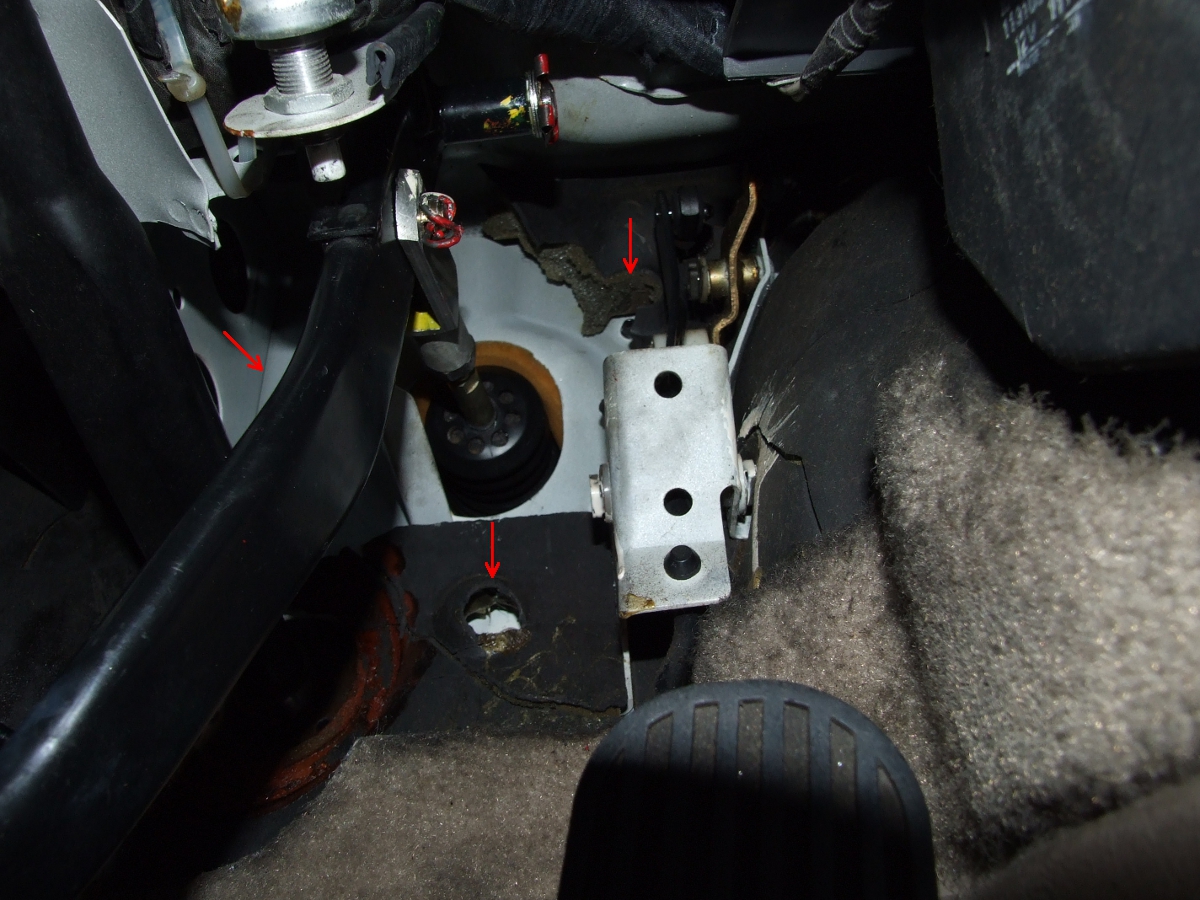
12. Once you remove the three nuts for the brake booster, the brake booster can be removed from the car. Gently bend the brake line just enough to get the booster out. Then pull the booster out.

13. Remove the blue hose from the clutch master cylinder if you wish. Remove the one clutch line from the master cylinder. Then remove the 2 nuts that hold on the master cylinder. Note that the washers will NOT be used in reassembly. The master cylinder will now pull off from the car.
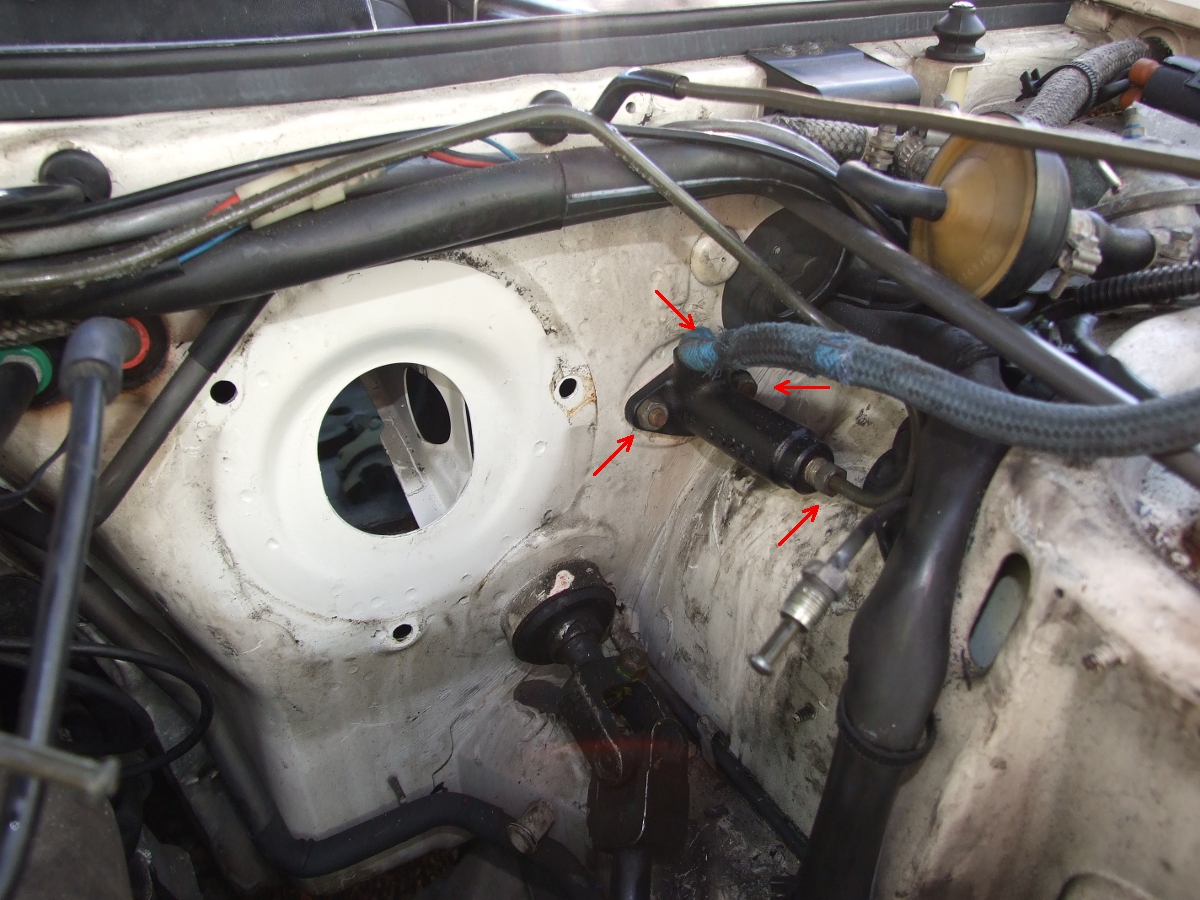
14. If you have an early car, 85.5 and earlier, you will need to remove the nut for the hose clamp on the AC lines. These AC lines will need to be pulled away from the firewall a little to allow the brace to be installed. Removing this clamp will allow the AC lines to move enough to get the brace to fit.

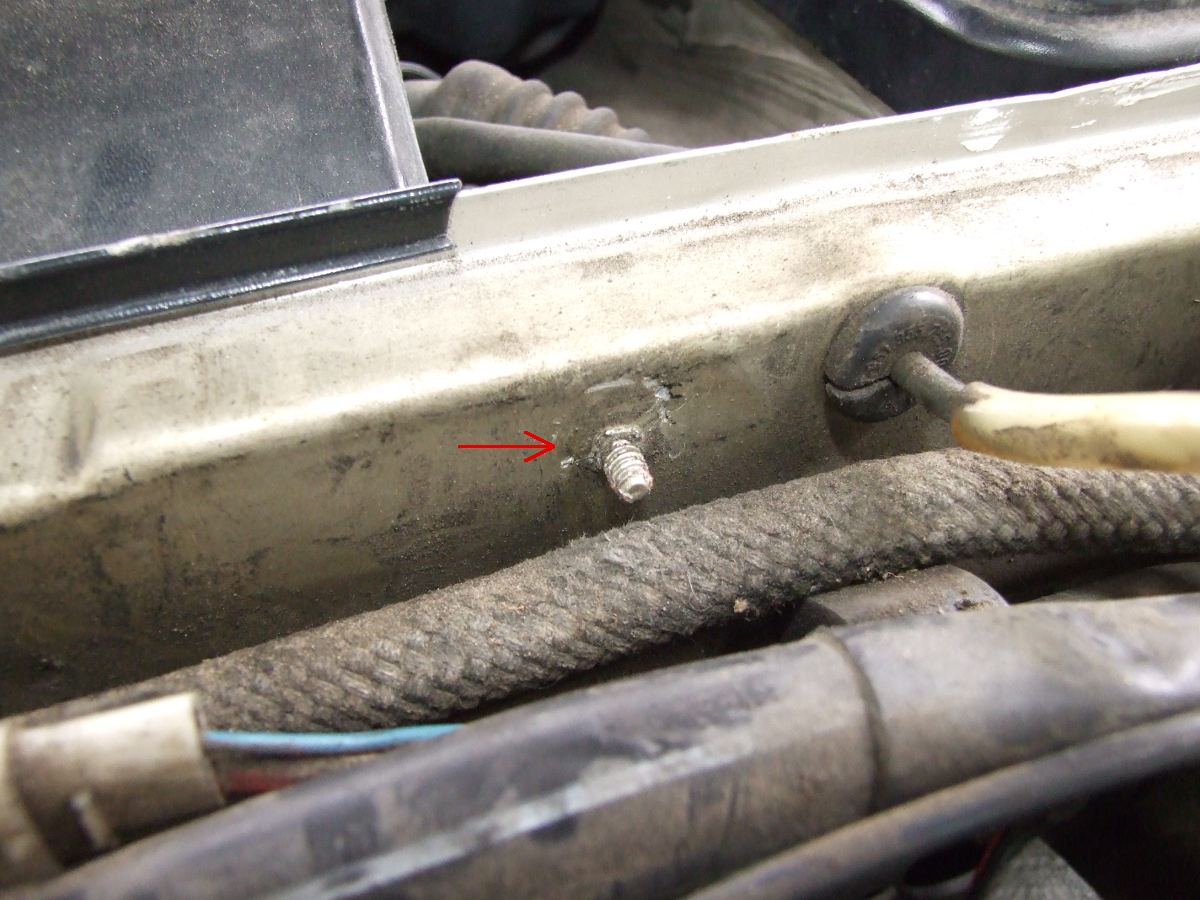
15. The early cars also have a welded on screw that needs to be removed from the firewall. The screw can either be cut off, or it can be removed with pliers by bending it back and forth until it comes off. It comes off fairly clean by bending it back and forth.
16. Take a razor blade and remove some of the rubber from the grommet, like in the picture. If you don’t there is a change that the brace will not sit flat against the firewall.

17. Now fit the brace onto the firewall. It’s a tight fit, and will only go on one way. Make sure the plate sits under the AC line and all the wires and hoses at the top.
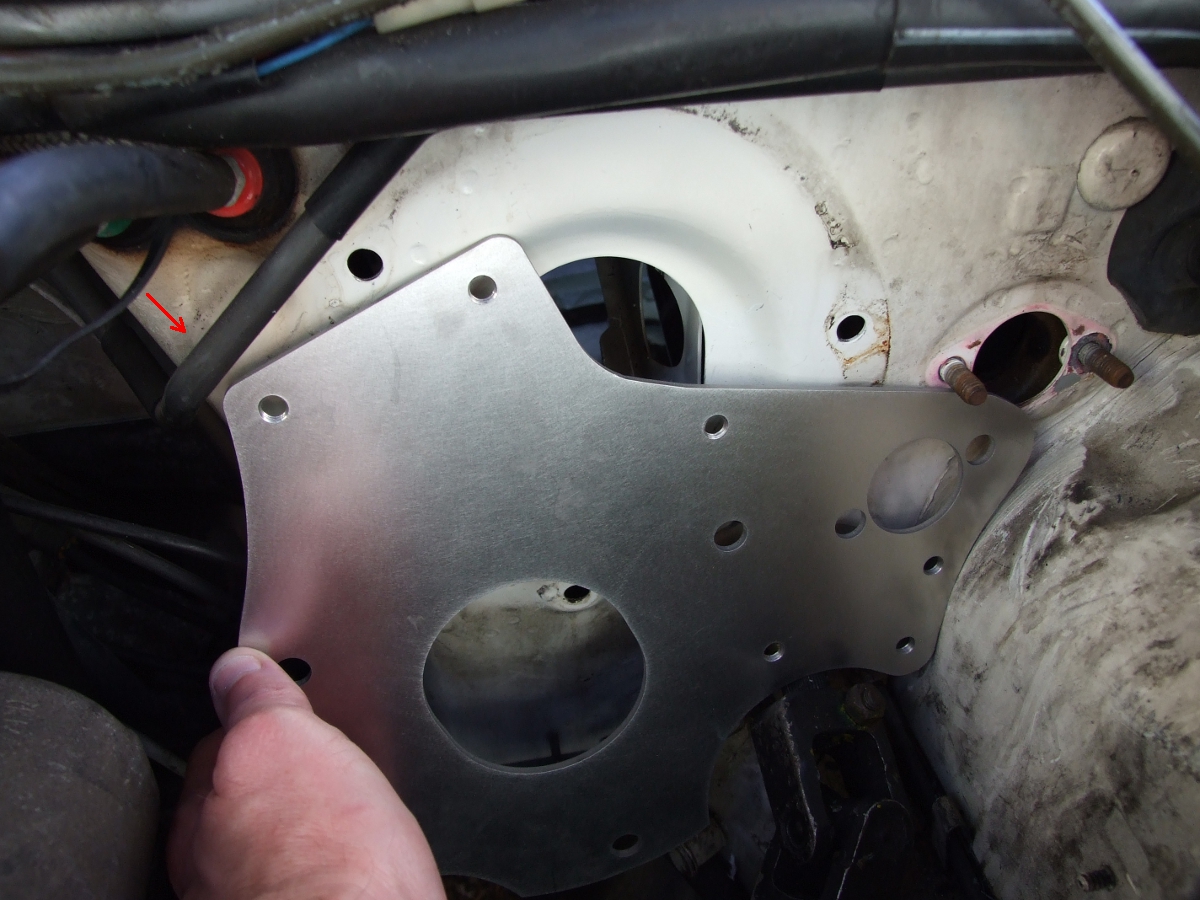
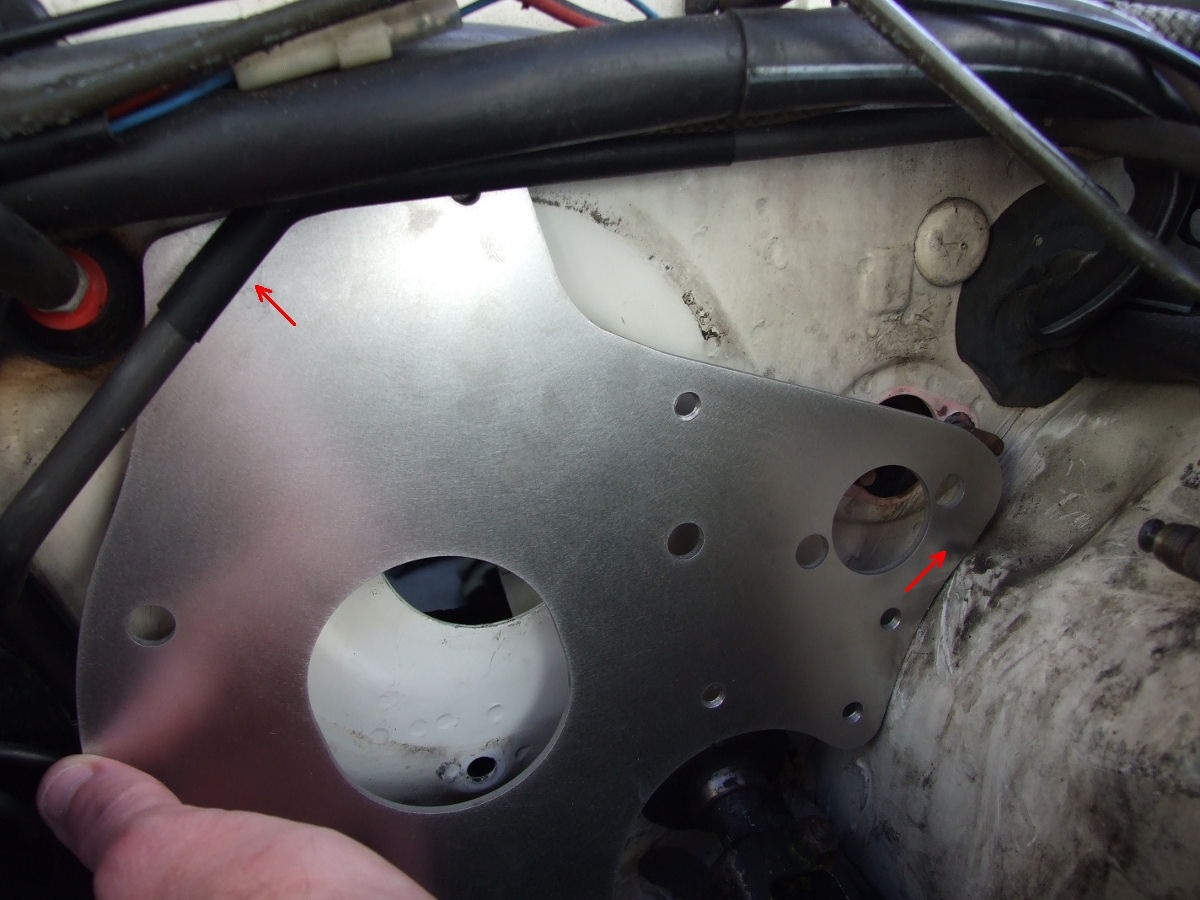
18. With the firewall plate held in place, put either two or three bolts in the holes for the brake booster. Use the nuts from the brake booster on the back of the bolts. Push the plate up and then tighten the bolts.
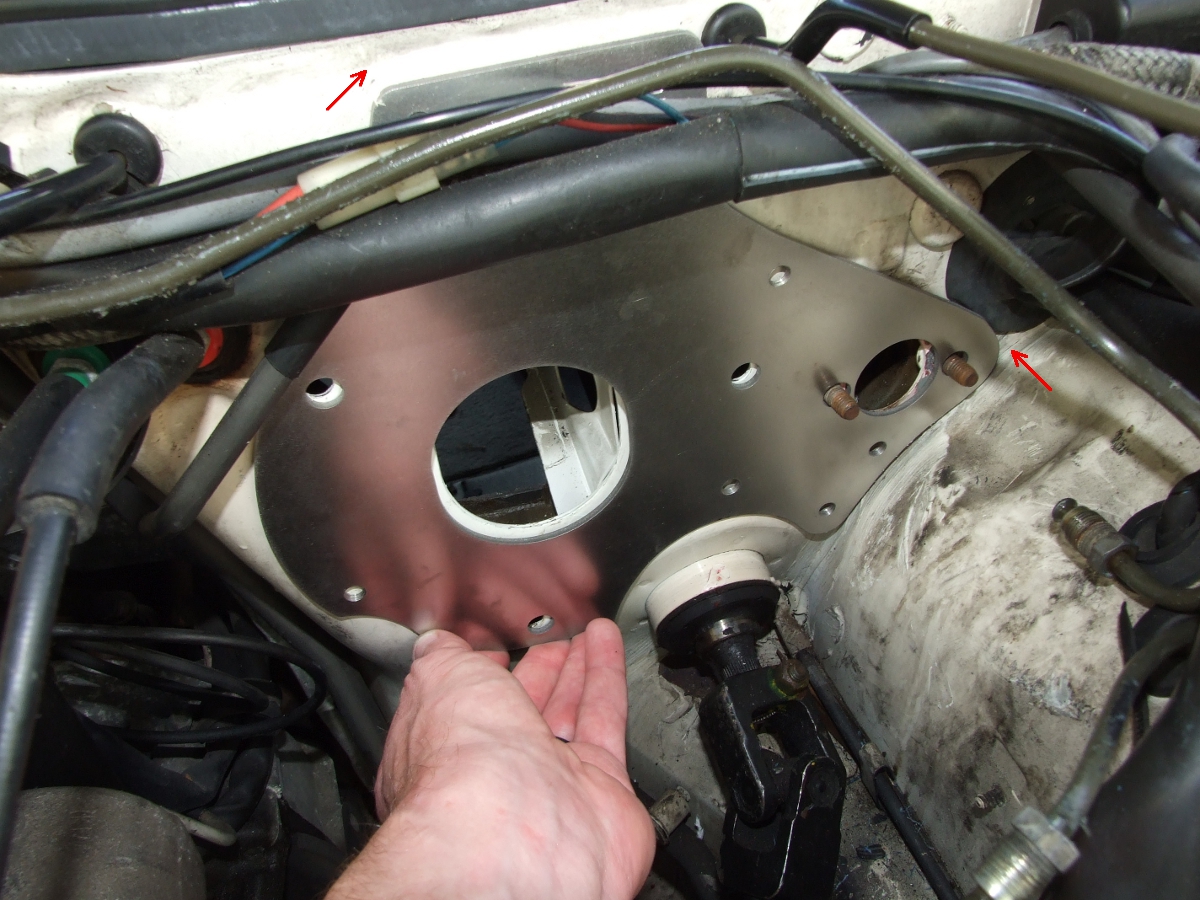
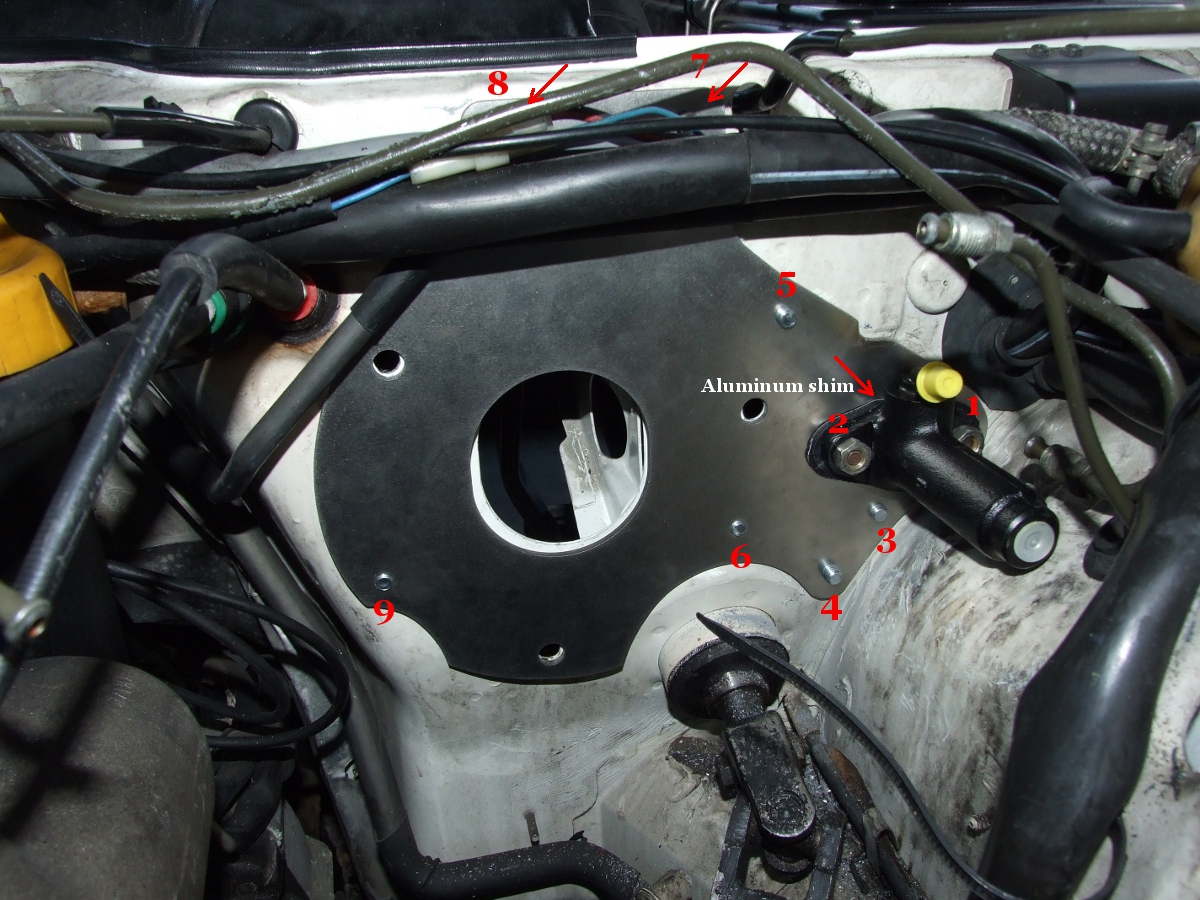
19. Now that you have the plate in place, you can mark out where the holes are going to be drilled. Use a small felt tip marker or a pen and mark a dot or circle inside all the holes with threads. Don’t forget about the two top holes too. As you can see in the picture I used a pen to make little circles where the holes need to be drilled in the firewall.

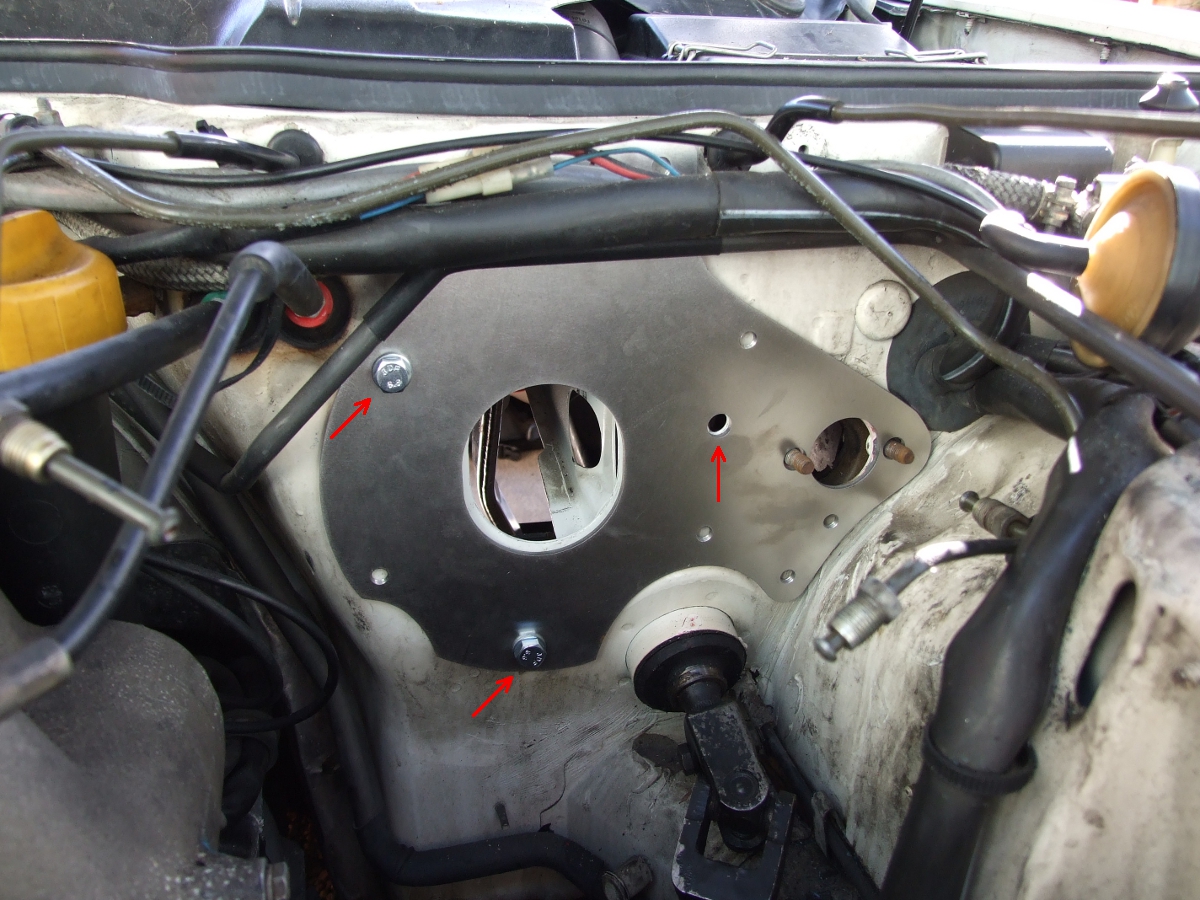
20. I would suggest drilling the top two holes first. Use a center punch in the middle of the holes and use the large drill bit to drill the holes. Be careful when drilling these holes, since the brake lines run directly behind where you are drilling. Once the drill bit breaks through the metal you will need to stop drilling to avoid hitting the brake lines.
* Tip: To protect the wires that run along the top of the firewall, wrap your drill bit with some electrical tape like in the picture. *


21. Continue to make a punch mark where the other holes are going to be drilled. Then either drill a pilot hole or just drill the hole. The two holes under the clutch master cylinder area are the hardest to drill because the drill will have to be at an angle. Start by using a center punch, but not where the hole needs to go, make the center punch about 3mm to the left of the center of the hole. Then drill a pilot hole, and then the large hole. Take your time and go slow with these holes. The reason for starting the hole 3mm to the left is because when you drill the hole with the large drill bit it will want to move to the right. Because you are drilling at an angle the hole will move to the correct spot when finished.

22. Now you should have all the holes drilled. It’s time to test fit the plate. Put the plate against the firewall to see if all the holes line up. If you can visually see that all the holes line up, good, if not you will need to adjust the hole with either a rotary rasp or something like it.
23. Now that it looks like all the holes are in the right place you can try screwing the plate onto the firewall. Just because it visually looks like all the holes are in the right place doesn’t mean that actually are. This is when you will find out if all the holes are actually in the right place. The picture below shows where each bolt goes and how many washers to use. Since it’s easy to loose the washers to drill the holes too big in the firewall, we’ve supplied some extra, small and large washers.
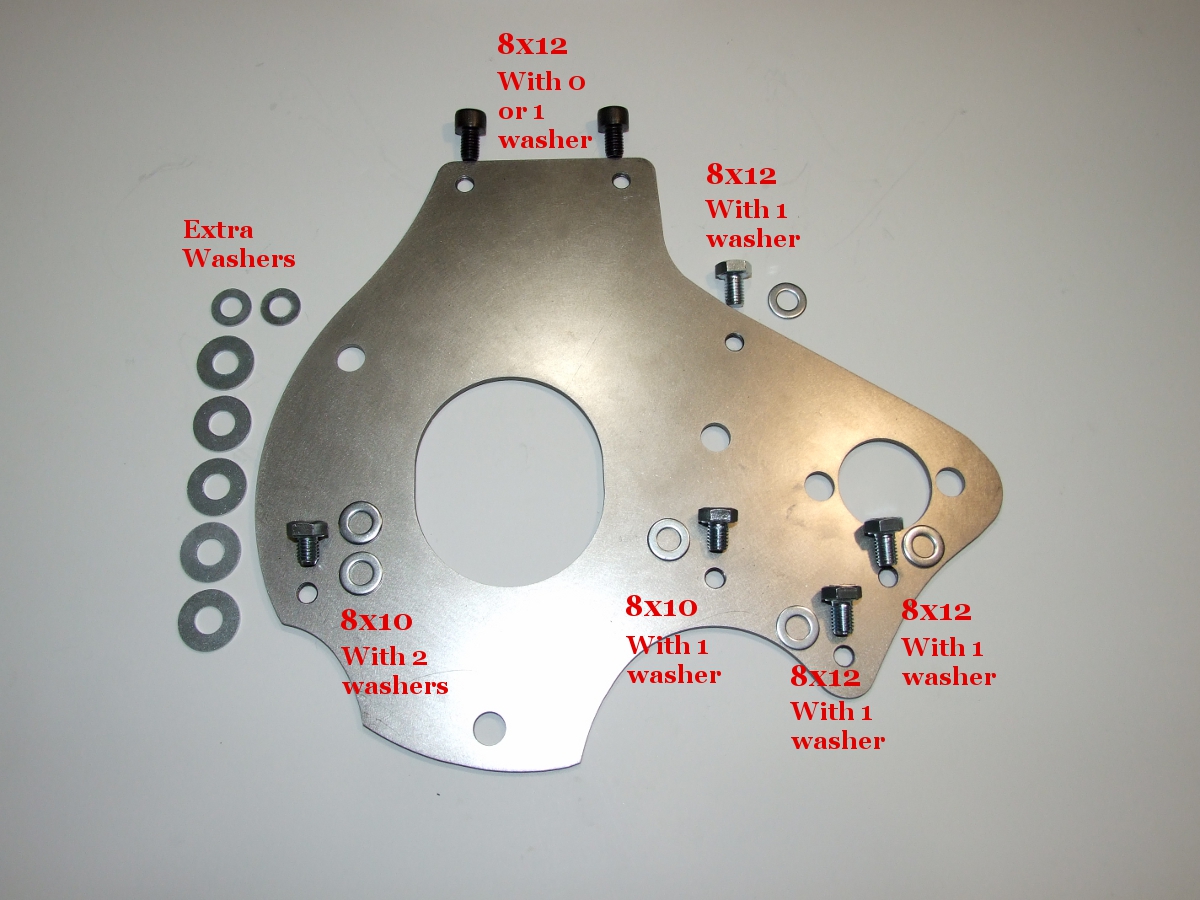
24. The picture below will show you the correct order to tightening the bolts. If you don’t go in this order the clutch master cylinder might not fit right. With the plate in place against the firewall, put the aluminum shim on the clutch master cylinder bolts. The shim should be installed with the thick part at the bottom and the thin part at the top. Then install the master cylinder and put the nuts on, without the washers. For now, install all the nuts and bolts finger tight. Once the master cylinder nuts are on finger tight then install the rest of the bolts in the order below.
* Please note that the Aluminum Shim gets installed with the thick part facing down, and the thin part facing up. You should NOT use a gasket for the clutch master cylinder when installing the aluminum shim. It is NOT needed and it’s added thickness will not allow the nuts to fully go on. The aluminum shim will act like a seal, the way an aluminum crush washer does for the oil drain bolt.
Some of these bolts are harder to get in because of where they are located. Bolt #5 is hard to reach, someone with small hands are a plus, also the use of a telescopic magnetic tool really comes in handy to hold the bolt while you place it and screw it in. This is also where you will need the U-joint swivel attachment on your socket. #9 can also be a little tricky. You should be able to get to it with one finger from the top and one finger from the bottom. You can slide a finger in from the bottom by going around the spring for the gas pedal.
If you were not able to fit all the bolts in, then the holes must not be in the right spot. Slot or grind the holes until you are able to fit all the bolts in.
25. Now that you know all the bolts will fit you can seal the plate to the firewall if you desire. I would suggest using something like RTV silicone or something like it. You can either remove the firewall brace from the car and apply the sealant to the firewall, or, you could leave the brace on the car and seal around the edge of the brace.
* Tip: to tighten the last bolt, #9, use a wrench by sticking it through the brake booster hole from the engine compartment, this seemed to be the easiest way.
26. Once you seal the brace, if you wanted to, you can install all the bolts in for the final time. I elected not to use loctite on the bolts but this would be the time if you desired. You are also going to want to make sure that you are installing the correct size bolts with the correct number of washers in each hole. Please refer to the picture above in step # 23
Once you are finished installing all the bolts for the last time, congratulate yourself!
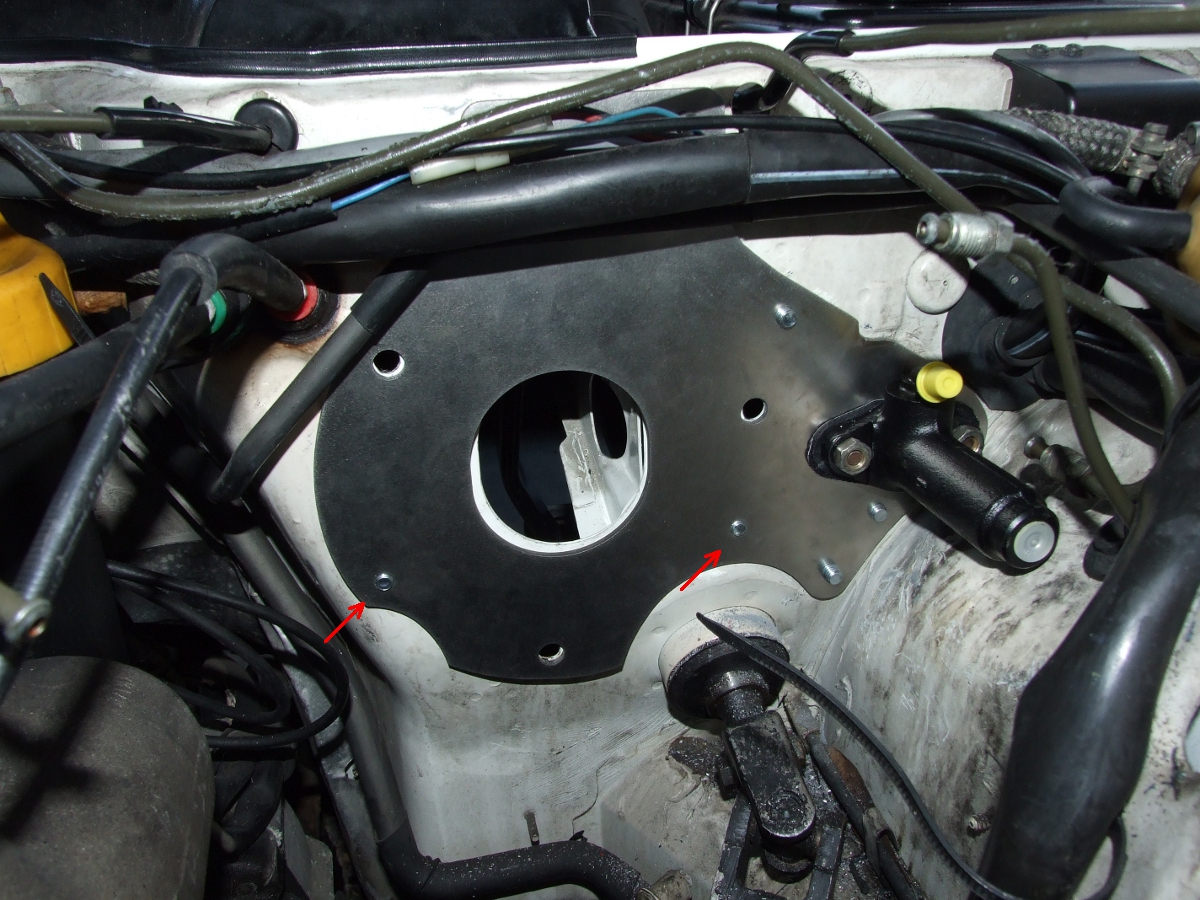
It should look like the picture below. Notice bolts #6, and #9 are flush, or very close to it, with the plate. This means you used the correct bolts and washers.
27. Now you can reinstall everything back onto the car. Basically it’s the reverse of the way you removed everything with a few minor differences
28. Install the hose back onto the clutch master cylinder and the hydraulic line onto the end of the master cylinder.
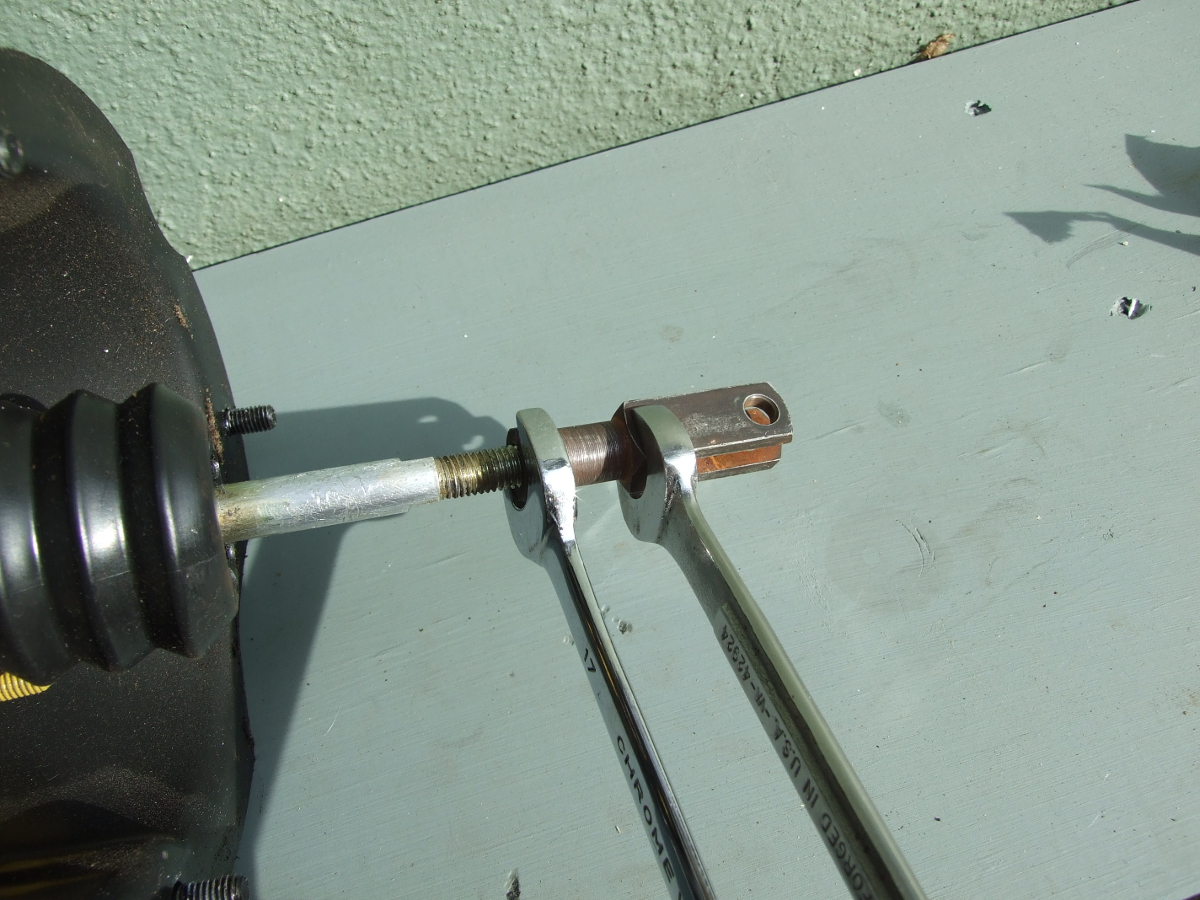
29. Before installing the brake booster you will need to loosen the nut on the rod. This can be on very tight and the best way to loosen it is with one wrench on the nut and the other wrench on the arm like in the first picture. Keep the nut loose so that you can adjust this arm after installing the brake booster.

30. Install the brake booster back onto the car and tighten the three nuts on the inside. Before installing the brake booster you might want to apply some sealant around the edge of the booster where it contacts the firewall(optional).
31. Install the vacuum lines back onto the brake booster and the other vacuum line that you removed.
32. Install the dip stick.
33. Install the brake master cylinder onto the brake booster.
34. Install all the brake lines back into the brake master cylinder and the hose that goes to the reservoir.
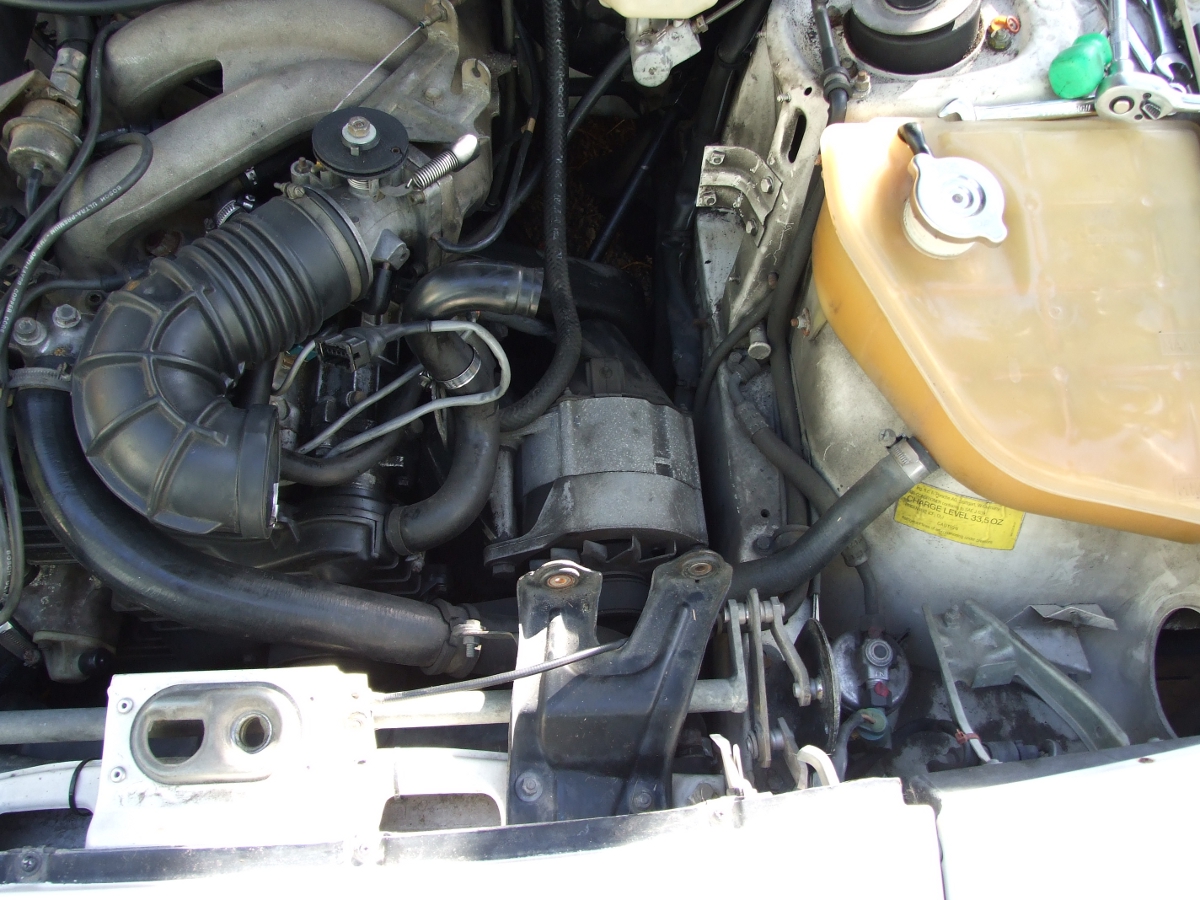
35. Install the airbox assembly.
36. Now go back inside the car to adjust the brake and clutch. Loosen the nut on the clutch adjusting arm and adjust the arm out until it sits snug against the clutch master cylinder. Once it’s snug, then tighten up the nut to hold it in place.
37. The brake arm nut should already be loose but if you forgot to loosen it you will need to now. Then adjust the arm so that it reaches the brake pedal. Once it reaches the brake pedal you can tighten the jam nut and reinstall the pin and clip on the brake pedal.
38. Now check to see if the brake lights are working. If the brake lights stay on all the time, then you will need to adjust the brake light switch on the brake pedal.
39. Reinstall the steering wheel and then the horn pad.
40. After the brake and clutch pedals are attached you can start to bleed the clutch and brakes. Start by bleeding the clutch, then the brakes. If you have a Motive brake bleeder the job is not hard at all.
Here is a link to clarks-garage for bleeding the brakes. Here


